This table was thrown away and left at the side of the road - its only crime; a slightly wobbly drawer front (easily mended with a brisk hammer blow and a touch of wood glue) and one corner lightly mauled by a dog.
I think it might be a vintage Ikea television stand from the days when you needed large drawers for video cassettes, and it's varnished pine which I cannot like so I was keen to paint it. I thought it was worth making a statement with a painted table top, as we have spiral stairs from which we can look down up on the coffee table like a painting on the carpet...
Our coffee table is a fully functional coffee table and not an occasional table. It must withstand food, tea, coffee, and adolescent feet when no-one's looking, so I didn't paint it until I had an idea for a robust table top, one with some texture and pattern so that visually, it would not be fussy about stains or damage.
I went on an Autentico paint workshop at Returned to Glory in Berkhamsted,
www.facebook.com/returnedtoglory - and tried out a
craquelure technique; one coat of slightly gluey glaze over the paint, then when tacky, another glaze, which cracks as it dries (either with a hairdryer or after 30 minutes). Then you can rub in some wax to highlight the cracks. After the workshop I took my test piece home and threw strong coffee on it and it rolled right off, so I decided it would be a good technique for this table.
I used Autentico paints
www.autentico-chalk-paint.fr, a pale blue (
Iceland, sort of cyan at the white end of the spectrum) and a red wax (wax mixed with
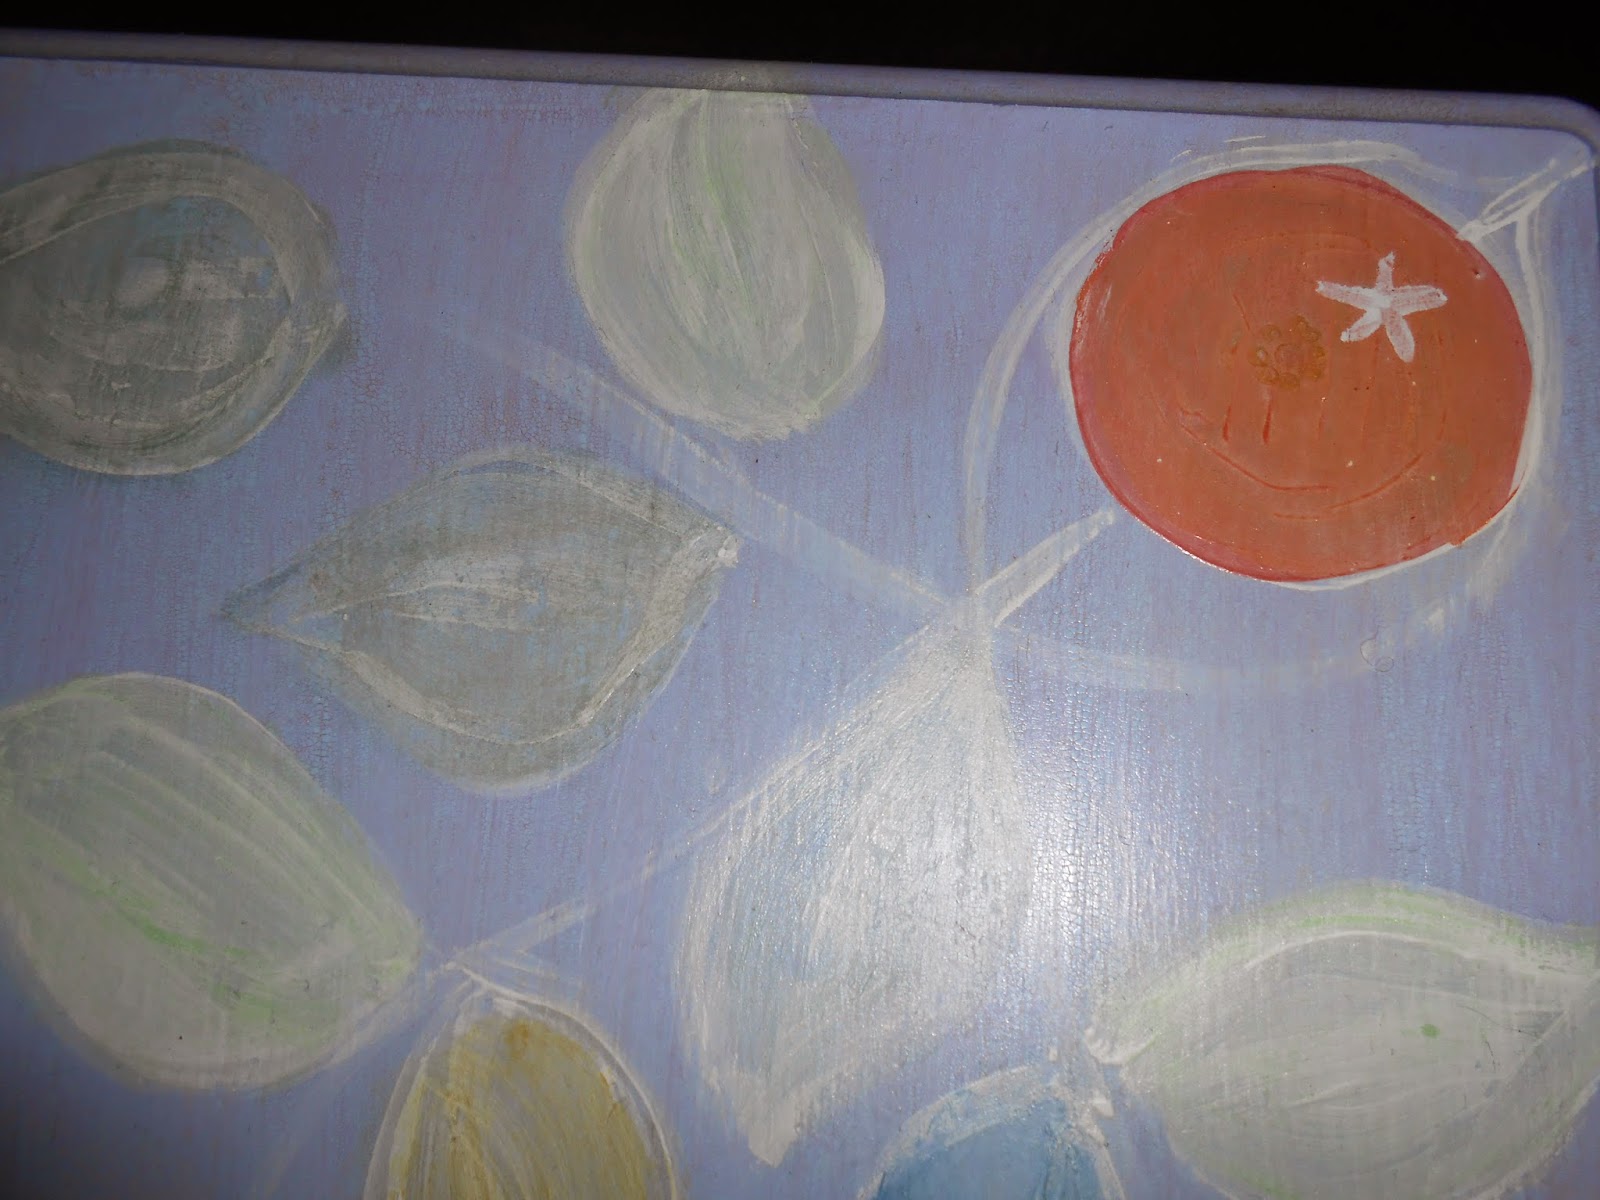
Think Red paint) to create dramatic cracks. It's meant to be an 'aging' technique but I like to leave aging and distress to time, and go for a more arts and crafts philosophy. However, the crackle didn't crackle, it barely fizzled. I think this was because I used 'Velvet' and not 'Vintage' paint. So I had something that looked like a red-streaked sky, a sky that was waiting for something - sunset, sunrise, or rain perhaps.
I decided it was waiting for some leaves. I used white paint (
Huile de Noix) to paint leaves in outline, it had a translucent watercolour effect over the
craquelure. I filled in the leaves with white paint, and then coloured each leaf in a slightly different colour using coloured waxes (I make my own with leftover paint and wax) in varying shades ranging from blue-green, to mint green and yellow-green. I drew a stylised Seville orange (B has just been on a school trip to Seville) to fit the leaves into each corner, and to tie in with traditional French porcelain knobs with a modern take (red, orange, greeny yellow and pale blue, from DIY shop Leroy Merlin). I was really pleased with the leaves, they looked like the silvery underside of leaves before a storm, or faded leaves at sunset - or sunrise.
I painted the sides and drawers with chalk paint which I tinted a lemony yellow-cream, and waxed.
I wanted to make sure that the leaves were sealed, so I used an ecological 'hard oil', two or three coats, and it proves to be a tough, resistant surface. I really love this product, based on soya oil, it is made by La Maison Naturelle
http://www.la-maison-naturelle.com - and is called 'polysol pro' - they don't seem to do the same product but have one similar under another name. It is a milky liquid, designed for any porous surface, interior or exterior. It can be swept over a floor or rubbed in with a sponge or cloth, but I like to 'paint' it on, making sure it gets into all cracks and dry bits. It can 'brown' if left too thick over paint but if applied carefully stays transparent. I would use this for areas above sinks, kitchens, bathrooms instead of wax (although I've never had any problems with wax), 3 or 4 thin coats.


.JPG)

.JPG)
.JPG)